This post guides you through the process of deploying and configuring the provided Silverlight application on Windows Azure through the Windows Azure Platform web portal using just your compatible web browser. You do not need any development tools…
The included Guest Wall application is a Silverlight app hosted in a ASP.NET website that runs on Windows Azure Hosted Services and uses the Windows Azure Cloud Storage to store messages that anyone can post. You can configure it to some extent as explained below.
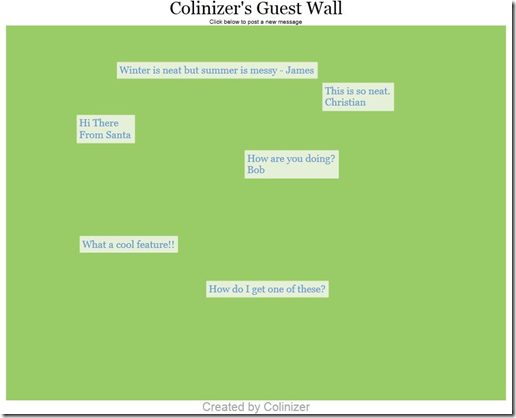
During December 2009* you will need the following 3 things to complete this deployment:
- The application package and configuration files provided** – download link in the guide below.
- A Windows Live ID to create a Windows Azure Platform account (or the Live ID you associated with an existing platform account). You can create a free Windows Live ID if necessary (using an existing email address or a new free Windows Live e-mail address that you can create at the same time).
- A token for a free preview* of Windows Azure services. These tokens are typically provided by Microsoft employees you know, at conferences, or via other people you know/follow that have spare unused ones. In Canada you can currently email cdnazure@microsoft.com to request one.
Deployment Guide
Step 1 – Get the application files
- Download the zip file and extract the 3 files to a suitable location you can remember (e.g. your desktop). The included source.zip file contains the source so you can (if you wish) download the full toolset to recompile or modify the code**.
Step 2 – Create a Windows Azure Platform account (if you don’t have one)
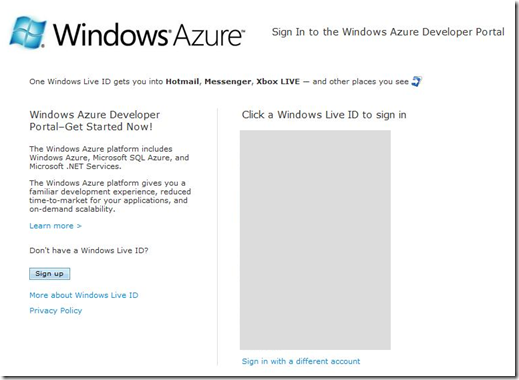
- Sign in using your Windows Live ID which leads you to the account creation process…
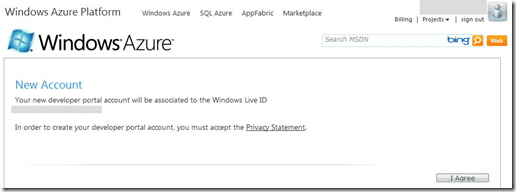
- Click “I Agree” to proceed if you agree to the Privacy Statement indicated…
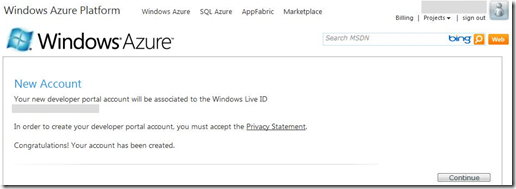
- Click “Continue” to proceed…
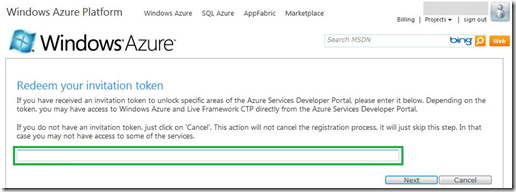
- Enter the unused token you have been provided for Windows Azure services and click “Next”. A valid token is in the format XXXXX-XXXXX-XXXXX-XXXXX-XXXXX where X is a letter or number.

- Click “Accept” to proceed if you agree to the Windows Azure terms of use indicated…

- “Continue” on to the main portal home page.
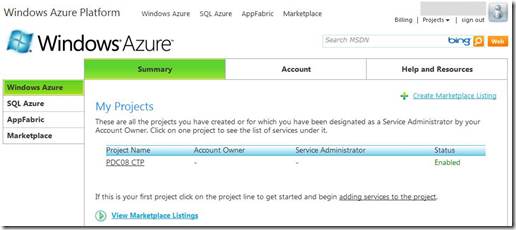
- Click on the Project Name (typically “PDC08 CTP”)…
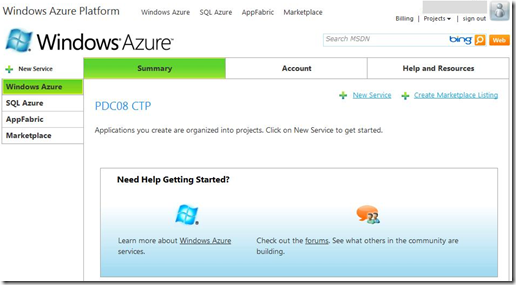
Step 3 – Create a Windows Azure Storage Account
- Click on “New Service”…
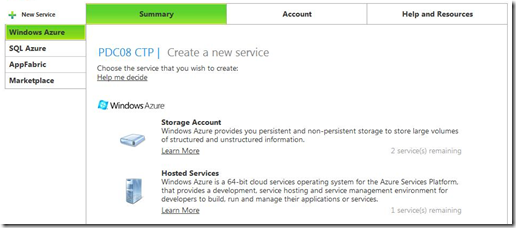
- Select Storage Account…
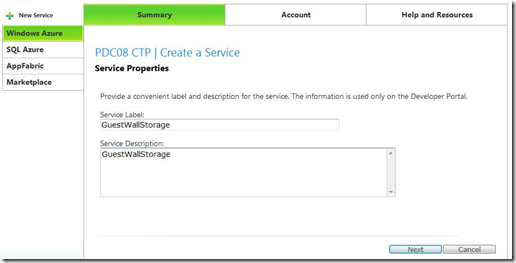
- Enter the text in the two boxes exactly as you see it above and click “Next”…
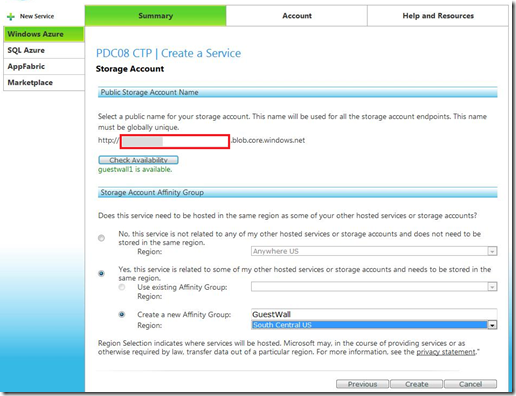
- Enter a storage host name. You need this later and it must be unique within the azure domain shown. You can check the availability using the button. Also, under affinity group, select “Yes”, and the “Create…” option; enter “GuestWall” for the affinity group name and select “South Central US”; finally click on “Create” and wait…
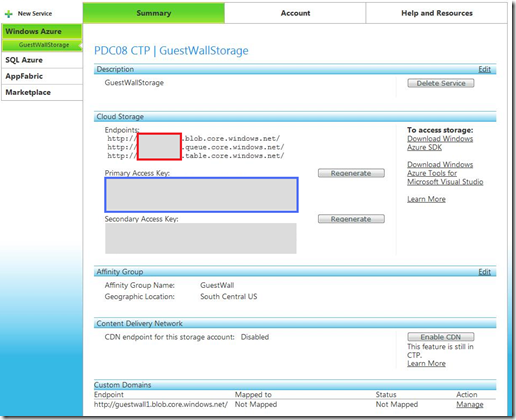
- You should see your Storage Host Name repeated 3 times. Copy the Primary Access Key for later. You have now created your Cloud Storage.
Step 4 – Create a Windows Azure Hosted Service
- Click on “New Service”…
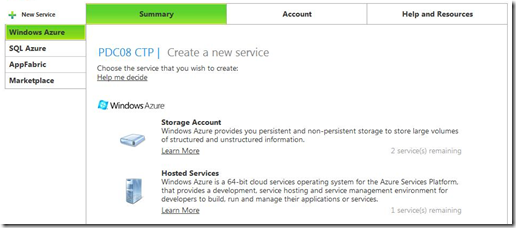
- Now, this time, select “Hosted Services”
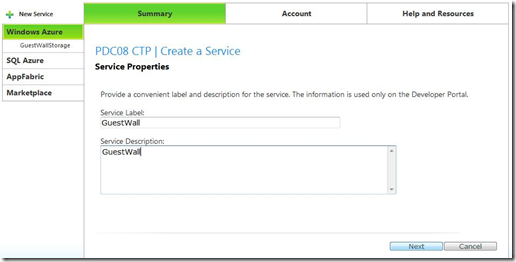
- Enter the text in the two boxes exactly as you see it above and click “Next”…
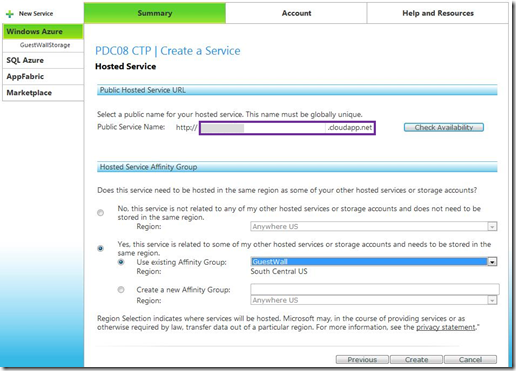
- Enter a service host name to create your Service Address. It must be unique within the Azure domain shown. This will be the public web address that is used to access your application. You can check the availability using the button. Also, under affinity group, select “Yes”, and the “Use existing…” option; select the “GuestWall” group you created before; finally click on “Create” and wait…
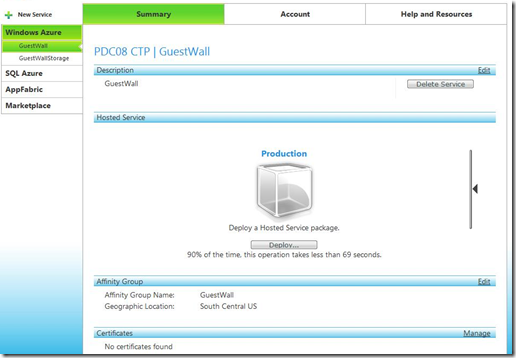
-
Now you are ready to deploy/upload the application. If you click on the vertical line and arrow on the right you will see an optional Staging deployment area. We are NOT using that in this sample deployment.
Step 5 – Deploy the application and configure it
Click on the Deploy button…
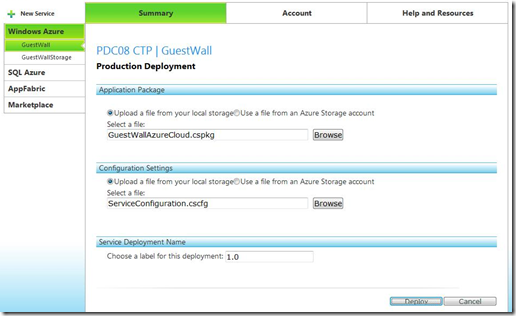
- Use the two “Browse” button to select the files you downloaded and extracted. The open file dialog will filter the view so that you only see 1 correct file type at a time for each button. Enter “1.0” in the bottom box as shown. Click the “Deploy” button and wait a while… and a while longer… perhaps 2 to 5 minutes.
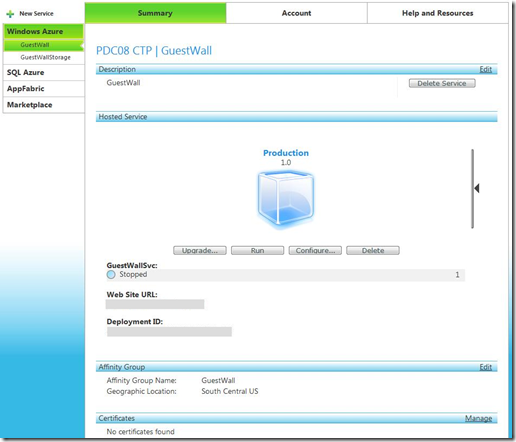
- Your application has been deployed in a “Stopped” state and needs to be configured first. Click on “Configure”…
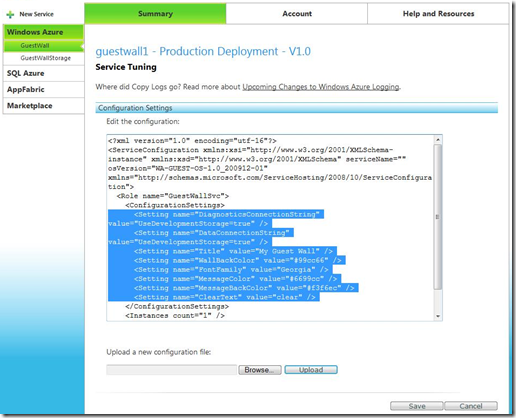
- And now for the trickiest part. Replace the highlighted XML shown above with the following XML. Then modify it by putting in your unique Storage Host Name (just the initial hostname, not the full web address) and your Primary Access Key (from earlier) in the places indicated.
<Setting name="DiagnosticsConnectionString" value="DefaultEndpointsProtocol=https;AccountName=YourStorageHostName;AccountKey=PrimaryAccessKey" />
<Setting name="DataConnectionString" value="DefaultEndpointsProtocol=https;AccountName=YourStorageHostName;AccountKey=PrimaryAccessKey" />
<Setting name="Title" value="My Guest Wall" />
<Setting name="WallBackColor" value="#99cc66" />
<Setting name="FontFamily" value="Georgia" />
<Setting name="MessageColor" value="#6699cc" />
<Setting name="MessageBackColor" value="#f3f6ec" />
<Setting name="ClearText" value="clear" />
- You can also modify the value of the other settings to customise the application. The ClearText setting is the text you enter as a special message to clear the wall of all messages – so you may want to change that to something that only you know.
- Be careful not to break the XML formatting.
- When you have finished, go ahead and click “Save”… and prepare to wait a few more minutes…
Updated: The " character after the second PrimaryAccessKey was incorrectly a left-angle double-quote character (“) – very subtle difference – now fixed; blame Windows Live Writer ;). If you were copying it to the portal you may have been getting a syntax error; your deployment could still be Run (below) without the updated configuration and be accessible, but it would not have been able to connected to the ‘wall message store’ to retrieve/store messages.
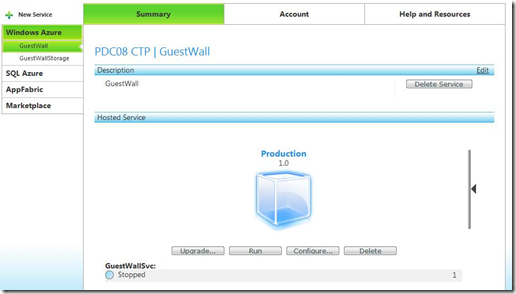
- Once you get back to this state… click on “Run” and wait until the small traffic light icon shows your application is “Ready”….
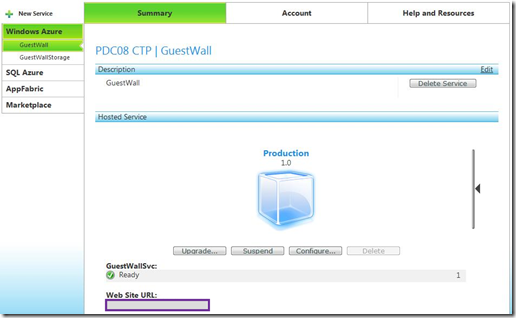
- Click on the Service Address link to try out your application. It may be a little slow the first time. Click on the large area to enter a message. Enter the text in the ClearText setting as a message, to remove all the messages. Check that the messages stay on the ‘wall’ when you refresh the browser. If the application shows an error indicating that it can’t retrieve messages then check the configuration file. Try changing the configuration to customise the look and feel of the application.
Step 6 – Leave me a comment 🙂 (and perhaps include your Service Address URL)
CONGRATULATIONS! – you have deployed your first Windows Azure Platform application.
Modifying your application
- To open the solution provided in the download, you will need Visual Studio 2008 SP 1 (or Microsoft Visual Web Developer 2008 Express with SP1) and .NET Framework 3.5 SP1. Before you open the VS solution you should also install the Silverlight 3 Tools for VS 2008 SP1 and the Windows Azure Tools for VS (and following the Instructions on that page). If you have SQL Developer, instead of SQL Express installed, you may need to do some configuration with the Azure Tools DSINIT command for the local Azure storage emulation to work. You need to run VS as an administrator to run the Azure test environment on your machine.
Good luck – and come back for other posts on Azure and Silverlight!
*On January 4 2010, the Windows Azure Platform products switch from token-based free community preview to live production but will remain in a free preview mode for one month with chargeable metered use beginning on February 1 2010. You will have to setup up a payment method in order to continue and be charged from that point. The platform includes Windows Azure (Hosted Services and Storage Accounts), SQL Azure and AppFabric (Service Bus and Access Control) which each have their own consumption-based pricing. Microsoft will include a quantity of Windows Azure Platform consumptions units as part of MSDN Subscriptions in certain countries.
**Content provided subject to this blog’s conditions of use for content. Additionally, I hereby grant you a royalty-free worldwide perpetual license to copy and make use of the original content I have created in this specific downloadable file and make derivative works of it as you wish provided you retain any included attributions in substantially similar works :-).
Smooth deployment, except 1 minor point.
Suggested configuration XML has 1 syntax error. There is wrong xml symbol “ after second PrimaryAccessKey“.
In order to make it work I had to replace it by symbol “.
Thank you,
Way cool! Thanks Colin!
Now updated Vladislav – thanks.
Cool program
I had one problem with the xml I had to copy, the last quotation mark was giving a syntax error when saving. Swapping with a standard quotation fixed the problem.
This is one cool app!! Just followed instructions and smooth deployment!
I got it up. It works awesome.
Thanks
stuck on initialization. can’t wait to deploy it. wait! i suspended and ran it again. it’s there 🙂
Very nice tutorial, Colin! You mentioned a few ways for getting tokens. I would expect that there will be some people who don’t have easy access to the resources you listed for getting tokens. Are tokens still available through the main Windows Azure website (http://www.azure.com) as well?
(I am contracting for M80, working with Microsoft to promote Windows Azure)
The general link for getting tokens is: http://go.microsoft.com/fwlink/?LinkID=129453 where apparently tokens are ‘generally issued within a few hours’.
It’s not yet clear how this will change as the system goes live (free preview) on Jan 4, and chargeable on Feb 1 2010.
People with MSDN subscriptions will end up with free consumable Azure units as part of their subscriptions – http://msdn.microsoft.com/en-us/subscriptions/ee461076.aspx.
Much thanks! I’ll be sure to pass this info on, as well as a link to your tutorial.
From what I’ve seen, the tokens are taking closer to a few weeks (as opposed to a few hours, like the website says), but Microsoft is probably getting overwhelmed with requests and needs to throttle the usage considering they are still in CTP.
[…] in giving Windows Azure a spin while it’s still free in January then you may want to try this Azure deployment guide with included sample application, successfully used by hundreds of […]
[…] you check out my Guest Wall application (including source code), you’ll see this in action as well as the code […]
[…] 不用工具,10分钟内在Windows Azure部署Silverlight Application: https://colinizer.com/2009/12/14/deploy-this-silverlight-application-on-windows-azure-in-10-minutes-n… […]
First, thanks much for this blog post. Second, I’m *so* close to uploading a friend’s quiz application, but am having trouble on Step 5.
Specifically, I have the files requried to run the applications, but I don’t have the files you’re uploading in Step 5 (cspkg and cscfg). Are these files from the source VS solution?
Hi Tom.
To get the files, you need to select the Cloud project in your solution, right-click and select Publish.
This will:
1 Package the files as it does for a debug run
2 Launch your default browser to windows.azure.com (though you may have done this already)
3 Open Windows Explorer on the folder containing the two files you need for the web portal
At this point, I do not have a Cloud solution. I only have the files required to run the Silverlight app. I’m guessing – please correct me if I’m mistaken – that I need to do the following:
1. Get the source from my co-worker – specifically the VS solution/project
2. Add a Cloud project
3. Point the deployment project at the Silverlight project
4. Then follow your instructions regarding publishing
Is that correct or is using VS the only way?
I just tried to upload your Silverlight app and everything appears to work until I attempt to run the application. At this point, I get an error message stating “Couldn’t retrieve wall messages – try again later”. The app appears, but I can’t click on it to add messages or see any existing messages.